Share
Pin
Tweet
Send
Share
Send
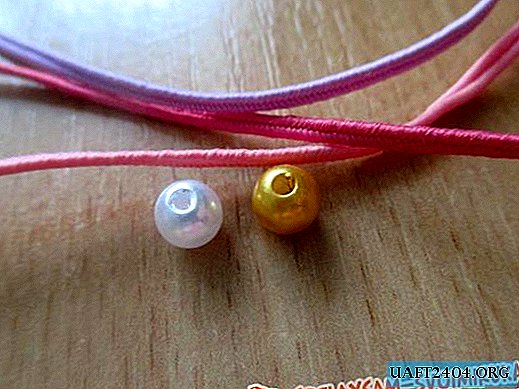
- soutache of three colors;
- beads of the same color;
- medium size beads, 4 pieces, two colors;
- shvenza 2 pieces;
- cardboard;
- a simple pencil;
- glue;
- leatherette or any very dense fabric;
- a needle;
- fishing line - 0.3 mm;
- scissors.
Getting started:
1. We carry curls with beads.
To do this, take beads and soutache. Soutache cut off 20 cm each.
We insert the fishing line into the needle and begin to sew the bead to the soutache.

We carry out the fastening on one side and the other and form a kind of horseshoe. At the point of convergence of the two ends, we flash it several times, for a reliable connection of the soutache cord. Be sure to try to make all the seams strictly in the middle of the cord, the whole appearance of the product depends on this. After attaching the beads, we perform a simple curl on one side.

We carefully fix it with additional stitches. We cut off the extra soutache and singe the ends. They are additionally fixed with a fishing line. Here is the wrong side.

Then we take the second bead and wrap it around with a suture cord.

The ends are drawn to the wrong side. Firmly sew on and additionally fix the cord between each other.

Cut off the ends and singe. Wrong side.


2. We decorate the inside of the earring.
We take a cardboard and circle the resulting product with a pencil. Cut the workpiece 2 mm smaller than the picture. We take leatherette and perform the same actions. When both blanks are ready, glue them together. Then we glue all the resulting “pie” to the future product. We put everything under the press until completely dry.

3. Then we begin to overcast the edge with beads.
We perform a simple overcast seam, between which we place the beads.

For accuracy and neatness of the product, we place the steps evenly and with equal grip of the leatherette.
4. Sew on a schwenz.
It should be located exactly in the middle of the product. This will prevent the earring from tilting to one side. We firmly fix the schwenzie back with return stitches. Turn the needle into the product and tie a knot.

(Even if you have not run out of fishing line) Cut off the excess.
On a note! Tying a knot after a secure fastening of the shvenzy promotes a strong attachment of the element and guarantees long and frequent use of the product in the future.
5. Finish over the edge of the earring.
We put in a new piece of fishing line and continue to work. We finish the whole row and securely fasten the fishing line near the shvenza.


6. We carry out the second earring in the same way, but we form curls in the other direction. This will turn out the right and left earring, distinctive from each other (Exactly what we need).


So our Ozornitsa earrings are ready, and in combination with the same brooch (A master class for making Ozornitsa brooches you will find in the same category), they are simply refined and harmonious.


They are perfect for both girls at a young age and women in years. This is a great gift for each of us. Wear and give smiles to loved ones!
Share
Pin
Tweet
Send
Share
Send

