Share
Pin
Tweet
Send
Share
Send
An ordinary mug can be decorated with a knitted heating pad. Such decoration will even be beneficial. A knitted heating pad will warm your hands that hold a hot mug, and also protect your hands from overheating.
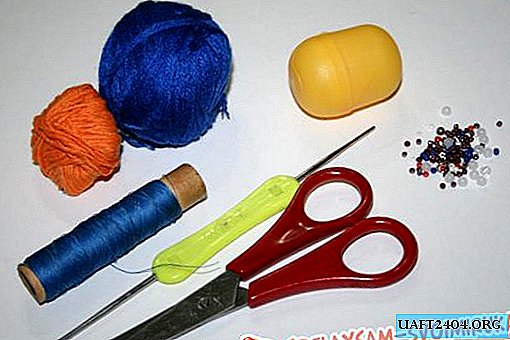
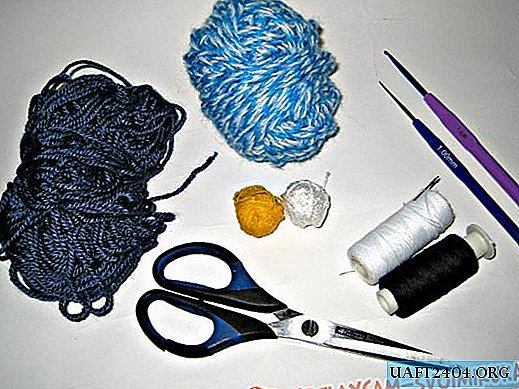
To make a heating pad you will need materials:
1. Threads are dark blue (warmer base).
2. Threads of white color (edging and decoration).
3. Threads of yellow color (nose of the Snowman).
4. Two-color threads (forelock and ties).
5. Sewing threads in white and black.
6. Hooks 1 and 2.5 mm thick.
7. Scissors.
The process of making a hot water bottle on a mug.
1. The first thing you need to do is measure the mug. I propose to knit a heating pad measuring 25.5 cm * 9 cm. With a hook of 2.5 cm, you need to dial a chain. It will consist of air loops (VP) 25.5 cm long.

2. We start knitting with a set of double crochet (CCH) along the entire length of the chain.

3. In this way we knit the fabric to obtain the desired height.

4. The heater should not go beyond the handle of the mug.

5. So that the heating pad has a beautiful contour, it is necessary to tie the edge with a white thread. To do this, we tie the thread in the corner of the main blue fabric.

6. We bind the heating pad contour with single crochet columns (RLS). We cut the thread and fix it.

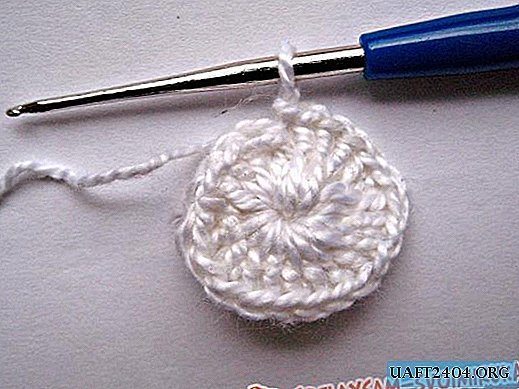
7. The base of the heating pad is ready. Let's start making jewelry. The main element is the snowman. It will consist of two circles. We begin to knit a large circle. To do this, on a hook with a thickness of 1 mm, we collect 4 VP.

8. Using a connecting loop (SP), you need to connect the chain from the VP to the ring.

9.Then we type 3 VP.

10. We produce a set of 21 CCH in a circle. The last column is connected to the beginning of the row.
11. We select the chain consisting of 3 VP.
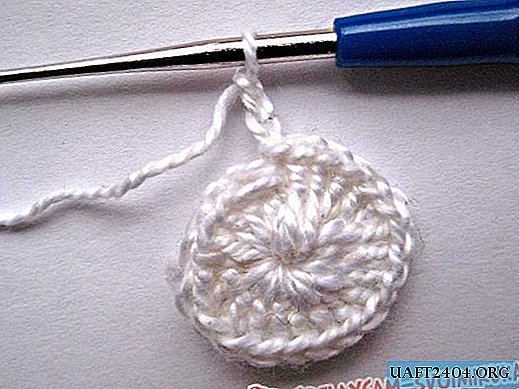
12. Then we make a CCH, capturing under the same loop from which the EPs of this row are typed.

13. Further, it is necessary to collect 2 CCHs from each VP of the previous row. At the end we connect a row.

14. The last row of the big circle we tie with the help of RLS.

15. The second circle we knit smaller. Knitting technique is similar to knitting a large circle.

16. Sew circles to the heating pad.

17. Make the Snowman eyes and mouth with black threads. Knit a yellow thread. From two-color threads we make a snowman’s forelock. Around the Snowman we knit snowflakes.

18. We get a beautiful winter composition.

19.To ensure that the heating pad can be attached to a mug, it is necessary to make ties. To do this, take 4 threads of the same size.

20.Fold the thread in half and stretch the loop into the corner of the heating pad on the wrong side.

21.2 free ends we extend into the loop.

22.Tighten the loop.

23. We make the same complication on the second edge of the heating pad.

24.On the other hand, we make 2 more ties.

25. Put on a heating pad on a mug. We tie ties to the bows.

26.Front, the warmer on the mug looks like this:
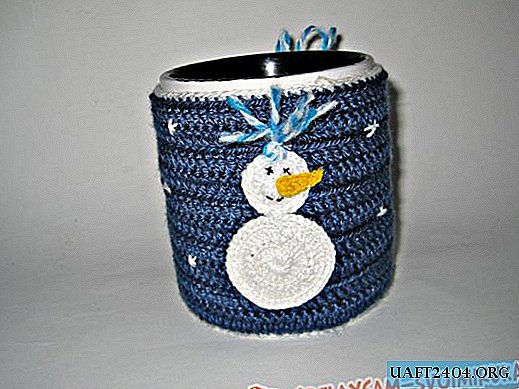
27. Side composition is:

Crocheted warmer "Snowman" will warm you on a cold winter day and give everyone a festive mood.

Share
Pin
Tweet
Send
Share
Send