Share
Pin
Tweet
Send
Share
Send
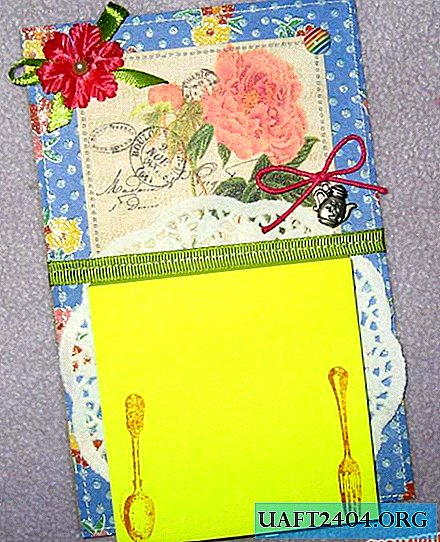
So, we need to take the following:
- Cardboard black and marble with a yellow tint;
- Men's scrapbook paper, size 20 by 20 cm, three sheets and still small scraps;
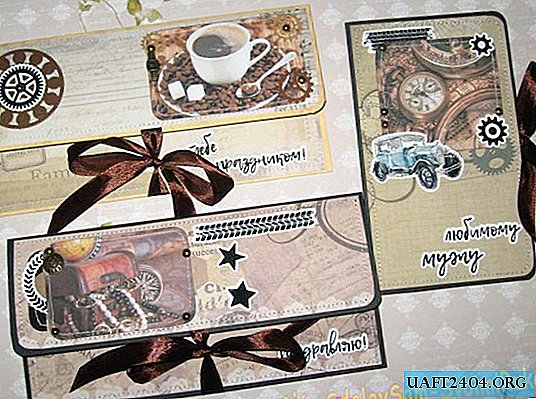
- Pictures with coffee, watches, gears and other masculine attributes;
- Cardboard die-cuts with the inscriptions "Beloved husband", "Congratulations", "Happy Holiday";
- Also from the die-cutting we take gears, a car, stars and twigs;
- Brads are metal bronze;
- Pendants metal bronze watches of two types;
- Semi-pearls are brown;
- Cutting down watches and gears of various shapes;
- Satin ribbon dark brown 12 mm wide;
- Whatman;
- Ink pillow for tinting;
- Glue stick, double-sided tape;
- Ruler, corner hole punch rounder, pencil, lighter and scissors.

We take a cardboard of A4 format, we unfold it and divide it into cuts of 7 cm by 10.5 cm by 7 cm. We draw bending lines from top to bottom, and cut off the excess.


Fold and get the blank in the form of an envelope. Now we take a rounder of corners and we make beautiful corners.


We do the same with the second marble cardboard. And from the third sheet of cardboard we are preparing the basis, as a postcard measuring 9.5 by 16 cm in folded form. Now we cut the strips of satin ribbon, all we need is 6 pieces. The edges of each tape on both sides are cauterized and glued to all the bases using double-sided tape.


Now we take scrapbook paper and we will decorate each base from above.


For each envelope, cut out three scrap elements from the scrapbook paper. Some corners are also rounded.


We glue the prepared elements from scrapbook paper on the back and inside with strips of double-sided tape. We simply attach the front parts and, at our discretion, apply pictures and decor.


Sew pictures, glue all the die cuts. We paste a piece of paper inside the postcard envelope, previously toning its edges so that you can write your wish there, and on the left side inside we will have a small pocket for money. We insert pendants into the brads and attach them to the pictures. Now we also glue the front scrap elements to the envelopes and sew them.


Now it remains only to glue the half beads and you're done. Envelopes for men are ready. Thank you and everyone until we meet again)).


Share
Pin
Tweet
Send
Share
Send